Bot Basics
Bots are an advanced Medplum feature that enable complex workflows. A Medplum Bot is a snippet of JavaScript code that can run on any resource change (create or update). This JavaScript code has access to a Medplum client , which itself can invoke FHIR operations.
Medplum Bots are run as AWS Lambdas and in heavily sandboxed environments. You can apply an AccessPolicy to the Bot if you want to further reduce the data it can read and write.
Bots are disabled by default for accounts. Contact info@medplum.com if you'd like to learn more.
If you want to run bots locally, you should use a VM Context. For more details see the Running Bots Locally docs.
Example uses
Consider some of these Bot use cases:
- Adding default values to blank or missing properties
- Custom data validation for custom business rules
- Creating communications for new patients
- Creating notifications for new lab results or reports
- Creating one or more resources for a Questionnaire Response
These capabilities would normally require writing custom code, HTTP servers, webhooks, and managing credentials for a separate service.
By using Bots, the entire logic is self contained and managed in one place. Like all FHIR resources in Medplum, the Bot resource is versioned with full history tracking, so you can see exactly what changed over time.
Creating a Bot
Bots are disabled by default. Contact your info@medplum.com if you'd like to learn more.
Bots are restricted to Project administrators. If you do not have access, contact your Project administrator.
To create a Bot, navigate to the Project Admin panel and click "Create new Bot".

On the next page you can enter a bot name and description (optional). You can also optionally set an access policy on the Bot, which can restrict the read/write privileges of the bot's code. By default, Bots have read/write access to all resources.

Click "Create Bot" to save the Bot, and you will see an acknowledgement that the Bot has been created.

Editing a Bot
You can see all Bots in your account on the Bot resource page: https://app.medplum.com/Bot
Click on your new Bot and navigate to the Editor tab. This presents a code editing window where you can write your Javascript code.

All Bots are simply a single TypeScript/JavaScript file with a standard async entry point function called handler. To start your bot, create a handler function as shown below in the Editor window.
import { BotEvent, MedplumClient } from '@medplum/core';

export async function handler(medplum: MedplumClient, event: BotEvent): Promise<any> {
  // Your code here
}
The following function arguments are available to the Bot code, to enable it to do the functionality it requires.
| Name | Type | Description |
|---|---|---|
medplum | MedplumClient | An instance of the medplum JS SDK (documentation) |
event | BotEvent | The event that object that triggered the Bot |
event.input | string | Resource | Hl7Message | Record<string, any> | The bot input, usually a FHIR resource or content that was posted to a bot endpoint |
In this example, we'll assume the input is a Patient resource and print out the patient's name.
import { BotEvent, MedplumClient } from '@medplum/core';
import { Patient } from '@medplum/fhirtypes';

export async function handler(medplum: MedplumClient, event: BotEvent): Promise<any> {
  const patient = event.input as Patient;
  const firstName = patient.name?.[0]?.given?.[0];
  const lastName = patient.name?.[0]?.family;
  console.log(`Hello ${firstName} ${lastName}!`);
  return true;
}
When you are done editing, click "Save" to save your Bot code to Medplum.
Understanding the code
Let's break this example down.
import { Patient } from '@medplum/fhirtypes';
//....
const patient = event.input as Patient;
This first line casts the contents of event.input of type Patient. This allows the rest of the bot code to take advantage of TypeScript's strong type system, along with IDE autocomplete and ESLint verification. Medplum provides type definitions for all FHIR resources in the @medplum/fhirtypes package.
const firstName = patient.name?.[0]?.given?.[0];
const lastName = patient.name?.[0]?.family;
This line extracts the first and last name for the patient. Since patients can have many different names (e.g. maiden name, common name, official name), Patient.name is an array. In this example, we will only consider the 0th name entry.
FHIR stores a person's first names, middle names, etc. in an array called HumanName.given, and the last name in the HumanName.family property. For more information, refer to the documentation for the HumanName datatype.
Because these properties may be undefined, we make heavy use of the Javascript optional chaining (?.) operator to access these properties.
Deploying a Bot
Clicking "Save" in the Editor tab persists your Bot code to the Medplum database, but doesn't deploy it to run in production. To deploy your bot, click the "Deploy" button.

This works well for initial prototyping, but as you get closer to a production implementation deploying from the command line potentially as part of a CI/CD can be preferred.
Medplum Bots are run as AWS Lambdas and in heavily sandboxed environments. You can apply an AccessPolicy to the Bot if you want to further reduce the data it can read and write.
Creating and Deploying Bot from your IDE instead of Editor tab
Alternatively, you can also write the code for a Bot and deploy from within your IDE.
- Create a Bot on Medplum and note its
id. (All Bots in your account can be found here) - Create a new typescript file (e.g.
my-bot.ts) and copy the contents ofexamples/hello-patient.tsinto your new file. - With the
idof the Botidin hand, add a section tomedplum.config.jsonlike so
{
  "name": "sample-account-setup",
  "id": "<BOT_ID>",
  "source": "src/examples/sample-account-setup.ts",
  "dist": "dist/sample-account-setup.js"
}
Then, you can deploy your bot from command line
Executing a Bot
Once your bot has been saved and deployed, it is time to execute the bot. There are a few different ways a bot can be executed:
- Clicking the "Execute" button in the Bot Code Editor
- Sending a POST request to the
$executeendpoint - Setting up a Subscription to execute the Bot automatically based on changes (see next section).
Executing from the Code Editor
The simplest way to to execute a bot is to click the "Execute" button inside the Bot's Editor tab.
This will execute the most recently deployed version of your Bot, with the event.input set to the contents of the
Input Pane.

In the output panel at the bottom right you will see the string "true", indicating that the execution was a success. To see the results of the execution, navigate to the Event tab. (You may need to reload the page.) The Outcome Desc column will show the result of the console.log.
Using the $execute endpoint
You can also execute a bot programmatically by sending an HTTP POST request to the Bot's $execute. Below is an example request sent with cURL:
curl -X POST 'https://api.medplum.com/fhir/R4/Bot/<BOT_ID>/$execute' \
  --header 'Content-Type: <CONTENT_TYPE>' \
  --header 'Authorization: Bearer <ACCESS_TOKEN>' \
  --data '<INPUT_DATA>'
Let's walk through each of the parameters here in more detail.
BOT_ID
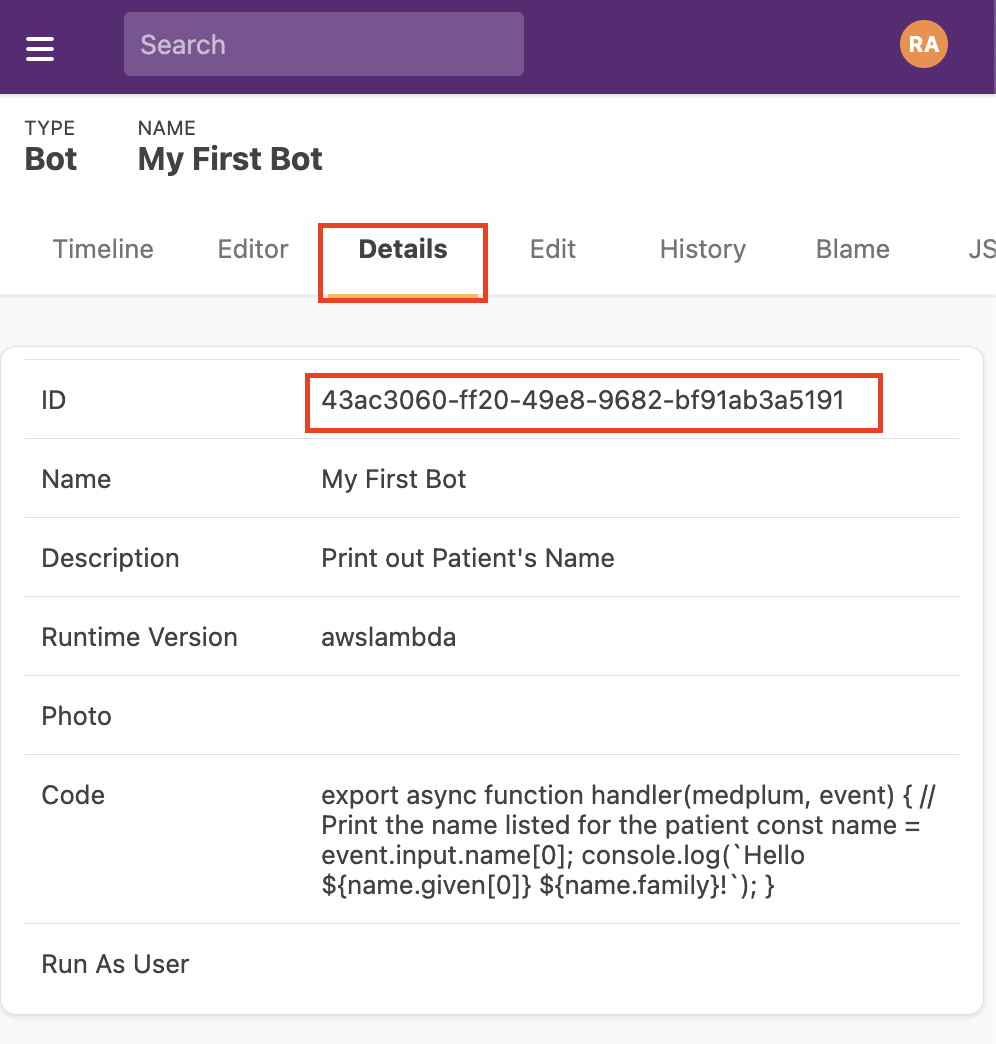
You can find the id of your Bot by clicking on the Details tab of the Bot resource. In this example, it is 43ac3060-ff20-49e8-9682-bf91ab3a5191

CONTENT_TYPE
| Content-Type | typeof event.input | Description |
|---|---|---|
text/plain | string | <INPUT_DATA> is parsed as plaintext string |
application/json | Record<string, any> | <INPUT_DATA> is parsed as JSON-encoded object |
application/x-www-form-urlencoded | Record<string, string> | <INPUT_DATA> is parsed as URL-encoded string, resulting in a key/value map |
application/fhir+json | Resource | <INPUT_DATA> is parsed as a FHIR Resource encoded as JSON |
x-application/hl7-v2+er7 | HL7Message | <INPUT_DATA> is a string that should be parsed as a pipe-delimited HL7v2 message. HL7v2 is a common text-based message protocol used in legacy healthcare systems |
ACCESS_TOKEN
This is the access_token you receive after completing the OAuth authentication flow. See this how-to for more information.
INPUT_DATA
This is the input data that will be parsed according to CONTENT_TYPE and passed into your Bot as event.input.
Read more in the Bot $execute documentation.
Executing automatically using a Subscription
While using the $execute endpoint allows developers to trigger Bots from 3rd party applications, the most common way to execute a bot is to use a FHIR subscription to trigger the Bot whenever a resource has been updated.
Let's connect our bot to Patient resources. That means that the Bot code will run on any "create" or "update" operation to any Patient.
Bots can be run as a cron job. Click Here to learn more.
First, go to the Subscription resources page.
Then click on the "New..."

To ensure the Subscription is running, change "Status" to Active

Specify which Resources will trigger this subscription using a FHIR search string. If you're not familiar with FHIR search semantics, check out this tutorial for a primer.
For this example, we will trigger the Subscription after a change to any Patient resource.
Change "Criteria" field to Patient

AuditEventsThe criteria of a subscription cannot be set to an AuditEvent resource. When a subscription is triggered it creates an AuditEvent, so using it as criteria would create a notification spiral.
Next, we specify action should be taken when the subscription is triggered, using the "Channel" field.
Because, Bots can be are executed using HTTP requests, we will select the Channel "Type" as Rest Hook and the Channel "Endpoint" as as Bot/<BOT_ID>.

Change "Payload" to application/fhir+json. This is similar to the CONTENT_TYPE field used by the $execute endpoint.

Finally, scroll down and click "OK".
Congratulations! Now you have an active Subscription. (View all Subscriptions)
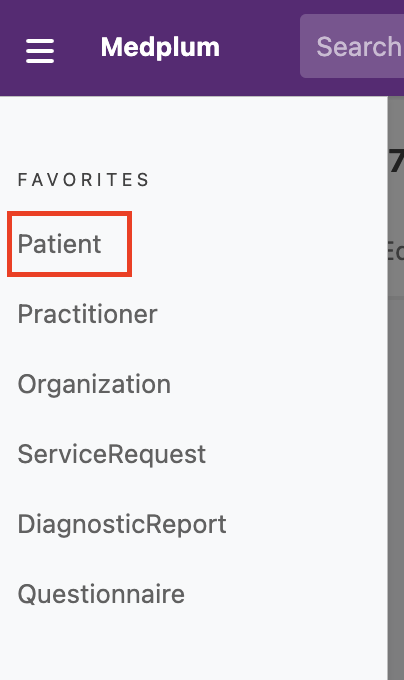
We can test our new subscription by creating a new Patient. First, go to the Patient resources using the top-left menu and clicking "Patient"

Next, click on the "New..." button

Enter a sample name such as given "Jane" family "Doe". Then Scroll down and click "OK"

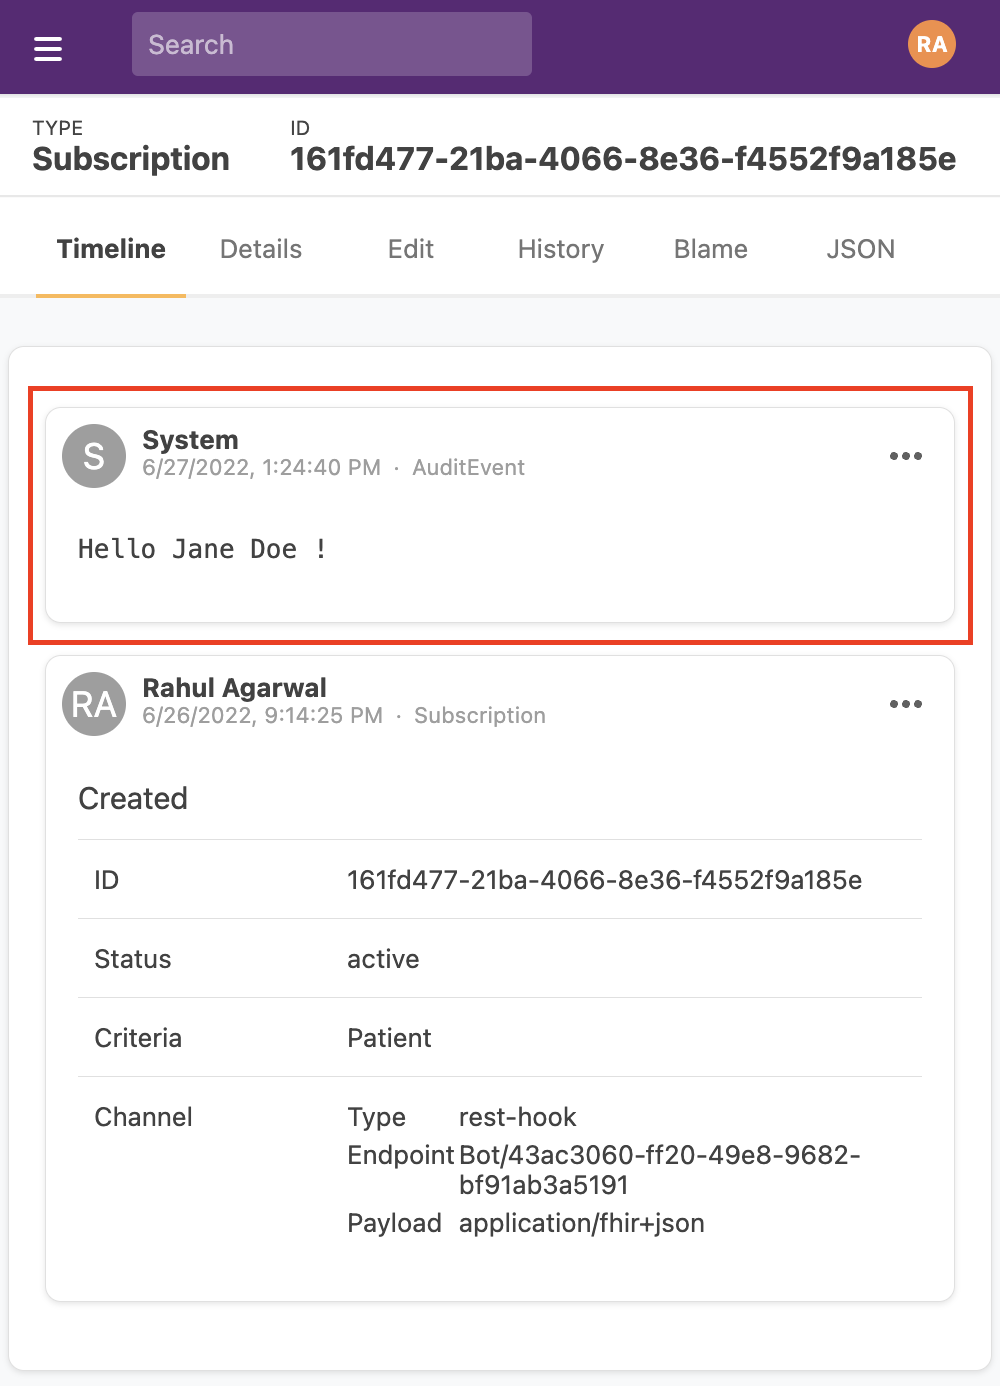
Now, let's go back to our Subscription. On the Timeline, you should see an AuditEvent with the outcome of the JavaScript code execution. If everything worked as expected, you should see "Hello Jane Doe" logged as part of the AuditEvent.

If you want to see all AuditEvents sorted by most recent, you can use this link.

Software Development Lifecycle
Bots written using the web editor are a great way to get started. If you would like to develop locally, test and deploy apps as part of your software development lifecycle, you refer to our next tutorial on deploying Bots in production